For success in the cannabis industry, understanding both the art and science of harvesting cannabis is crucial. The process requires precision, patience, and proper planning, which is why, in this article, we will explore how to harvest cannabis for maximum yield and the highest quality.
Whether you’re a licensed cultivator or a producer operating in a region where personal cultivation is permitted, this article will walk you through the essential steps to ensure your cannabis is ready for harvest and reaches its full potential.
Sections
ToggleStep 1: Pre-Harvest Planning

The first step in the process of harvesting cannabis is pre-harvest planning. You cannot expect the experience to be stress-free without proper planning. There are a lot of resources required to ensure efficient harvesting.
You will be required to prepare the equipment to be utilized in the process. Here are some steps to take:
- Sharp and clean pruning shears for faster harvesting
- Proper protective gear, such as gloves to protect your hands and prevent contamination
- Clean drying racks or lines for curing
- Sharp trimming scissors
- Magnifying glass or jeweler’s loupe for inspecting the buds
- Clean, sanitized jars for curing
- Hygrometer for monitoring humidity
The equipment and tools are essential to streamline the workflow and be efficient when the plants are ready to harvest cannabis.
Step 2: Monitor Trichome Maturity

The next step is determining when to harvest cannabis. To know the right time, you have to monitor trichome development closely. Trichomes are tiny, crystal-like structures on the surface of cannabis flowers. These structures contain most of the plant’s cannabinoids and terpenes.
You have to examine the trichome using a magnifying glass or jeweller’s loupe to know when cannabis is ready to harvest. What you should be looking for is:
- Cloudy or milky trichome structures that suggest peak THC content
- Amber textured trichomes indicate a more relaxing, CBD-rich profile
The plant is still being prepared if the trichomes have a clear appearance. Most cultivators aim for a mix of cloudy and amber trichomes. The appearance and color appearance are key observations to understanding how to know when to harvest cannabis for optimal potency.
Step 3: Prepare the Harvesting Environment

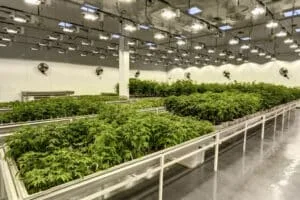
If the plant is ready to be harvested, you must create an ideal environment for harvesting a cannabis plant. It is essential to maintain the quality of the harvested product. Your harvesting facility must be clean and sanitized to prevent contamination. Ensure proper ventilation to control humidity. The ideal temperature should be around 70°F or 21°C. Also, maintain a dark or dimly lit environment to preserve trichomes.
Step 4: Cut Plants Carefully

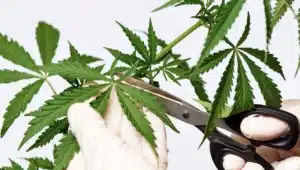
Once you confidently determine that your cannabis is ready for harvest, it’s time to cut plants to extract the raw material for further processing. Remember, we mentioned sharp, clean pruning shears; you will need them to cut the main stem near the base of the plant.
If you are harvesting cannabis outdoors, experts recommend cutting plants early in the morning when they are full of moisture. For indoor cultivation fields, timing could be more critical. Cut plants should be handled gently to avoid shaking off valuable trichomes.
Step 5: Remove Fan Leaves

The cannabis plant has large fan leaves that have little to no THC content. It is better to remove these leaves as they can significantly increase the drying time. Also, the high moisture content in these leaves makes the crop susceptible to mold. Removing fan leaves early on makes the later stages of processing much easier. Use gloves to protect your hands and maintain cleanliness as you work through each plant.
Step 6: Trim Sugar Leaves

The next step of harvesting cannabis is to trim sugar leaves. As these leaves are too close to the buds, you can’t simply remove them as fan leaves. Sugar leaves have more THC content than fan leaves. Still, they are less desirable and trimming them improves the appearance and smoking quality of the harvest. How closely you trim is a matter of personal preference and intended use.
Step 7: Decide on Wet or Dry Trimming

Now that you have removed most of the leaves, it’s time to decide whether you want to trim buds while the plants are wet or wait until after drying. Both methods offer their advantages for cannabis harvesting.
Wet trimming makes it much easier to cut close to the bud. It improves bud drying time and reduces the risk of mold. On the other hand, dry trimming is slower and requires more controlled drying, but it potentially results in better flavor preservation.
Your choice should be based on factors like the humidity levels in your facility, available space, and personal preferences.
Step 8: Drying the Cannabis

It is one of the crucial steps in harvesting cannabis. Proper drying decides how well you can preserve the potency and flavor of cannabinoids and terpenes in your harvest. The best method of properly drying the cannabis is to hang the trimmed branches upside down in a dark, well-ventilated area.
The area should have a temperature of around 60-70°F (15-21°C) and humidity between 45-55%. Typically, it takes 7-10 days to dry cannabis properly, but can vary based on environmental conditions and bud density.
To test if the buds are sufficiently dry, try bending small branches. If they snap rather than bend, then the harvest is dried.
Step 9: Curing for Quality

Curing will decide whether your cannabis is of premium quality or not. Once the buds are dry, gently remove them from the stems and store them in airtight glass jars. Ensure you are filling these jars at most 75% to allow air to flow through the buds. Place these jars in a cool, dark place and “burp” them daily for the first week by opening the lids for a few minutes. Burping allows excess moisture to escape and fresh air to enter. After the first week, reduce burping to once every few days.
Depending on the moisture content in the buds, the curing process can last from 2-8 weeks, with longer cures generally resulting in better flavor and smoothness.
Step 10: Quality Control Checks

Understanding quality control checks is an aspect of learning how to harvest pot plants. You have to monitor the yield throughout the drying and curing process. Inspect the cannabis buds for quality and potential issues.
Look for consistent dryness and proper trim. Also, there must not be any mold or mildew growth. Moisture content also affects the aroma profile of the cannabis, so regular checks will help ensure that your final product meets your standards and is safe for consumption.
Step 11: Storing Cannabis Properly

Cured cannabis should be stored in airtight containers and placed in cool, dark storage for long-term shelf life. The ideal storage temperature is around 60-70°F (15-21°C) with humidity between 59-63%. If you are in a dry region, consider using humidity packs to maintain optimal moisture levels within storage facilities. Proper cannabis storage is essential to preserve potency and flavor.
Step 12: Cleaning and Maintenance

After harvesting a cannabis plant, ensure the equipment and the cultivation area are thoroughly cleaned. This step prevents the spread of pests or diseases to future crops. Clean and sanitize all tools, drying racks, and surfaces. Indoor growers should take time to maintain grow lights, ventilation systems, and other equipment to ensure they’re ready for your next grow cycle.
Conclusion
We hope this guide will help you master how to tell when to harvest cannabis. While we have outlined all the essential steps for harvesting cannabis, you will become efficient in harvesting as your skills develop with experience. Remember, for producing high-quality cannabis, patience is vital. From monitoring trichomes to determining when to harvest cannabis, all steps require meticulous planning.


